Firstly, I am now an international superstar and well published author... well sort of. Earl was kind enough to post a mention of tedsguitar on his site, guitarguitarguitar. I have no doubt at all that very soon the name Ted sit proudly beside other authors such as Cumpiano and Netelson.
Scrolling through Earl's site I found so very disturbing news. Olga has been served with a take down notice which in effect removes one of the largest collections of guitar tab and chords going around. Obviously there are other places on the net but, is this just the start?
Now, I can totally understand why the corporate music world went hunting after Napster and other peer to peer music trading sites, but when it comes down to internet quality tab and chords I think they have gone too far. What's next? will they start asking high school bands for royalties each time they play a song. What percentage of an artist's earn is made from the sale of music books.
Another point is that these books are notoriusly bad. They are obviously transcribed by computers at worse, at best a classically trained violinist.
Internet tabs and chords provide the start required for the next generation of guitar players, who will in turn be the next big thing that the music industry will seek a percentage from. Without this resource, kids will have to return to the days rote learning Smoke on the Water, a song from some bad they have never heard off. How many kid will pay $30.00+ to buy a music book?
Time taken : Nil
Tools used : Nil
AU$'s spent : Nil
Sunday, August 20, 2006

Saturday, August 19, 2006
More expense
Today I went down to the hardware shop and picked up a Dremel. I've already drawn blood after engraving the end of my finger - great peice of kit. Dad tells me that he will use it all the time so obviously the expense is not wasted on this one project.
It's been one of those days where I've not been able to make a sound start on anything. I cut out the mold this morning and started gluing on the side braces and then I renewed the sand paper on the sanding board.

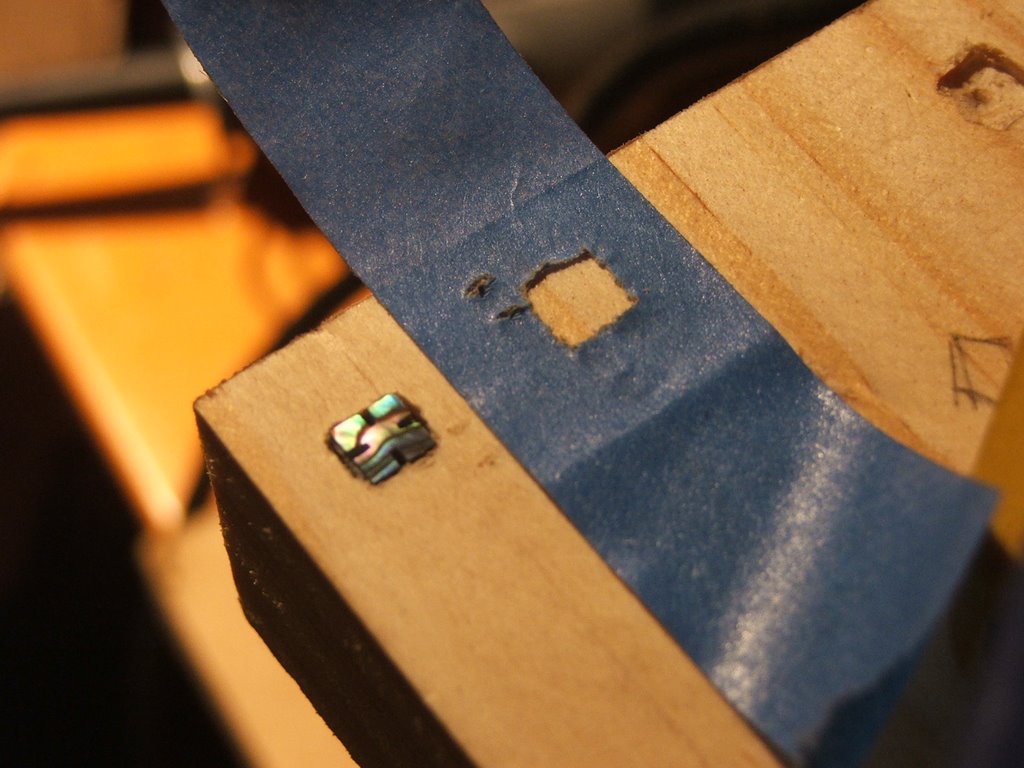
I marked out the places on my fret board where the snow flake inlays will go and then I started having dry runs at cutting out the squares for the inlay to slot into. I am getting really worried that my skill levels are not high enough to make a decent job out of putting these inlays. Will I be able to get them in neatly without ruining the whole look of the guitar? I hope so. I've gone to the Guitar Builders Forum in an effort to find some ideas as to how to get them in neatly.
The best way I've found so far is to use the Dremel to hollow out the square. I cut the shape required from a piece of masking tape to use as a guide. I can get the piece to fit nicely, just the edges of the square are not sharp. Will this matter? I don't think these inlays are at a beginners level.

Time taken : 2 hours
Tools used : Glue, clamps, pencils, Dremel, drill, craft knife.
AU$'s spent : Dremel $126.00, Clear glue $12.98
It's been one of those days where I've not been able to make a sound start on anything. I cut out the mold this morning and started gluing on the side braces and then I renewed the sand paper on the sanding board.

I marked out the places on my fret board where the snow flake inlays will go and then I started having dry runs at cutting out the squares for the inlay to slot into. I am getting really worried that my skill levels are not high enough to make a decent job out of putting these inlays. Will I be able to get them in neatly without ruining the whole look of the guitar? I hope so. I've gone to the Guitar Builders Forum in an effort to find some ideas as to how to get them in neatly.
The best way I've found so far is to use the Dremel to hollow out the square. I cut the shape required from a piece of masking tape to use as a guide. I can get the piece to fit nicely, just the edges of the square are not sharp. Will this matter? I don't think these inlays are at a beginners level.
Time taken : 2 hours
Tools used : Glue, clamps, pencils, Dremel, drill, craft knife.
AU$'s spent : Dremel $126.00, Clear glue $12.98
Thursday, August 17, 2006
Feeling Good
Rushed home from work today, raced into the shed and starting tearing off those 34 clamps that were holding my soundboard down. I am really happy - It stuck. My greatest fear (second to the routing coming up) has been conquered.
Tonight I glued 80 grit to the 5 degrees side of my sanding board (should have done that days ago) and then I got busy with shooting the fret board. Word to the wise, this takes ages when you don't have a ban saw or similar to get up to the line. I started with the hand plane and then got worried about it tilting to an angle so I went to the board. I have worn grooves into my work top.
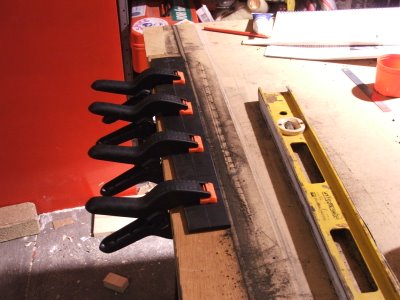
I am a little worried about the taper down to the head. What if I take too much down at the body end... Oh well, I'll just keep edging up to the white line.
Just one point on this - Sanding the fret board makes fine black dust. Your hands get covered in find black dust... Don't put your grubby dirty mitts on your lovely clean soundboard... you'll be upset and start looking forward to sanding off the mess.
Lastly, my inlay arrived today. Looks nice but now I am not so confident and I have no idea what pattern I am going to put in.
Time taken : 2 hours
Tools used : 80 and 120 grit, contact cement, long spirit level, string clamps, craft knife, white pencil, hand plane
AU$'s spent : Nil
Tonight I glued 80 grit to the 5 degrees side of my sanding board (should have done that days ago) and then I got busy with shooting the fret board. Word to the wise, this takes ages when you don't have a ban saw or similar to get up to the line. I started with the hand plane and then got worried about it tilting to an angle so I went to the board. I have worn grooves into my work top.
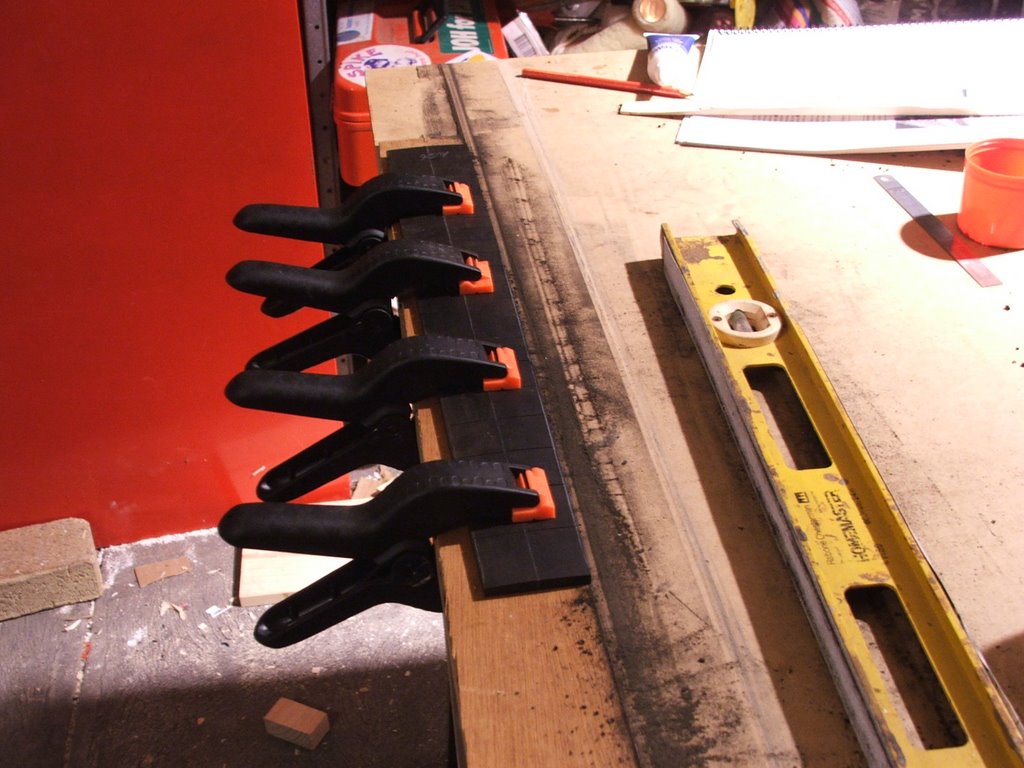
I am a little worried about the taper down to the head. What if I take too much down at the body end... Oh well, I'll just keep edging up to the white line.
Just one point on this - Sanding the fret board makes fine black dust. Your hands get covered in find black dust... Don't put your grubby dirty mitts on your lovely clean soundboard... you'll be upset and start looking forward to sanding off the mess.
Lastly, my inlay arrived today. Looks nice but now I am not so confident and I have no idea what pattern I am going to put in.
Time taken : 2 hours
Tools used : 80 and 120 grit, contact cement, long spirit level, string clamps, craft knife, white pencil, hand plane
AU$'s spent : Nil
Wednesday, August 16, 2006
The Lid Is On !
I have just this minute come inside from gluing on my sound board. It was a little stressful and I was madly zipping around screwing down the bolts on my homemade clamps. I felt there was plenty of glue and in most places I had a decent squeeze out of the glue but in other places none at all - more stress.

It really wasn't that difficult - my greatest concern is that the ends remained square as I forced the bottom up to fit in under the sound board. I guess that it must be - if my measurements are correct - I only had to shift in about 1/8th anyway, so it's not going to be a huge difference.
Recalling this evening - I also signed the sound board and wrote "August 2006 - The First One - Stewart Macdonald OOO" - Stupid me, I signed on the nice flat surface of the bridge plate base, the surface that will soon have 6 holes drilled into it! Mess up number #??? complete.
Time taken : 1 hour
Tools used : glue, clamps, socket set and ring spanner.
AU$'s spent : Nil

It really wasn't that difficult - my greatest concern is that the ends remained square as I forced the bottom up to fit in under the sound board. I guess that it must be - if my measurements are correct - I only had to shift in about 1/8th anyway, so it's not going to be a huge difference.
Recalling this evening - I also signed the sound board and wrote "August 2006 - The First One - Stewart Macdonald OOO" - Stupid me, I signed on the nice flat surface of the bridge plate base, the surface that will soon have 6 holes drilled into it! Mess up number #??? complete.
Time taken : 1 hour
Tools used : glue, clamps, socket set and ring spanner.
AU$'s spent : Nil
Tuesday, August 15, 2006
Another day off?
Again there was no work today (I am all but in strike) so I got to play around with my guitar. It poured down today, cats and dogs kids of weather - an amazing thing last night, I went to glue the last of the centre line braces to my back board. The wood was like a realy firm putty... I could bend it between two fingers... now I understand (or start to) humidity.
Being wet, I am limited as to what I can do, but I have finished the braces.

This morning I built 15 more clamps, just like I did yesterday and then I started making dry runs at getting the sound board onto the edges.

I am amazed at the amount of pressure that this box will be under - no gluing or elsewise today - I have to wait until the humidity settles down. Who would dare glue their box shut in this weather?

Time taken : 3 hours
Tools used : hack saw, drill press, saw table, glue, rulerd
AU$'s spent : $27.00 again
Being wet, I am limited as to what I can do, but I have finished the braces.

This morning I built 15 more clamps, just like I did yesterday and then I started making dry runs at getting the sound board onto the edges.
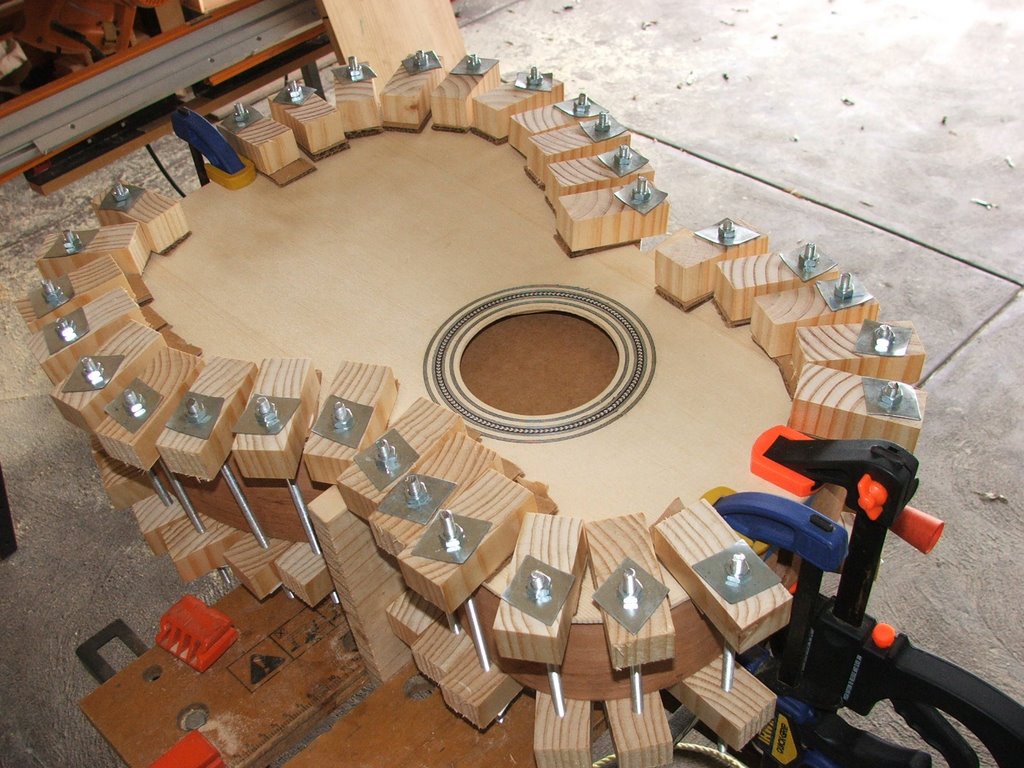
I am amazed at the amount of pressure that this box will be under - no gluing or elsewise today - I have to wait until the humidity settles down. Who would dare glue their box shut in this weather?

Time taken : 3 hours
Tools used : hack saw, drill press, saw table, glue, rulerd
AU$'s spent : $27.00 again
Monday, August 14, 2006
No work today
No work today, so Ted gets to play.
This morning I headed off to Bunnings again to get supplied to make the spool clamps. A suitable length and size of dowel was going to cost something like $50.00 so I had a little head scratch and came up with an alternative.
I bought two 70 X 30mm X 0.9M pine boards, five 24 X 1/4 inch all threaded steel rod, 30 1/4 inch nuts and 30 washers.
When I got home, I made up the table saw and cut the board into one inch wide blocks, thirty of them. Then I drilled a 1/4 inch hole through each one and using super glue, stuck on a piece of the thick cardboard left over from making the inner mold.
Once all together, I ended up with 15 clamps - Which leaves me 15 clamps short as it turns out. I will but have to duplicate the whole procees again tomorrow before I am able to tackle closing the box.
Not content on having spent enough cash today - I flipped out the old Visa card and bought an once of inlay pearl from Australian Luthier Supplies. Your guess is as good as mine as to what I am going to do with it but my plan is to have a go at making some sort of signature inlay. Crazy thinking maybe.
Time taken : 3 hours
Tools used : hack saw, saw table, drill press, super glue, rulers, pencils
AU$'s spent : Items detailed above $27.11
This morning I headed off to Bunnings again to get supplied to make the spool clamps. A suitable length and size of dowel was going to cost something like $50.00 so I had a little head scratch and came up with an alternative.
I bought two 70 X 30mm X 0.9M pine boards, five 24 X 1/4 inch all threaded steel rod, 30 1/4 inch nuts and 30 washers.
When I got home, I made up the table saw and cut the board into one inch wide blocks, thirty of them. Then I drilled a 1/4 inch hole through each one and using super glue, stuck on a piece of the thick cardboard left over from making the inner mold.
Once all together, I ended up with 15 clamps - Which leaves me 15 clamps short as it turns out. I will but have to duplicate the whole procees again tomorrow before I am able to tackle closing the box.
Not content on having spent enough cash today - I flipped out the old Visa card and bought an once of inlay pearl from Australian Luthier Supplies. Your guess is as good as mine as to what I am going to do with it but my plan is to have a go at making some sort of signature inlay. Crazy thinking maybe.
Time taken : 3 hours
Tools used : hack saw, saw table, drill press, super glue, rulers, pencils
AU$'s spent : Items detailed above $27.11
Sunday, August 13, 2006
Box coming together.
Well I was a little disappointed with the wood show. I guess it would have been okay if you were looking for a piece of machinery but there was no makers of instruments, no stalls dealing with finishes or paints and nothing in relation to inlays or decorations etc. It really didn't suit someone in my position.
I did get a chance to look at the Dremels and a lot of similar tools and a few small routers and trimmers. I think I am going to settle on the Dremel and go ahead and order the precision router kit from StewMac. In relation to routing the I am (again) flipping from one choice to another. It is my latest task that I am worried about, as to whether or not I will be able to complete it properly.
At the wood show, I bought the biggest, flashest and hi tech(est) protractor that I saw. I got it home and then I found out that it did not measure below 15 degrees - great. I had a quick sulk and then got out that old plastic school protractor and made the sanding board, cutting the angel with a jigsaw. After all the thinking and planning, dumbing it down worked fairly well.
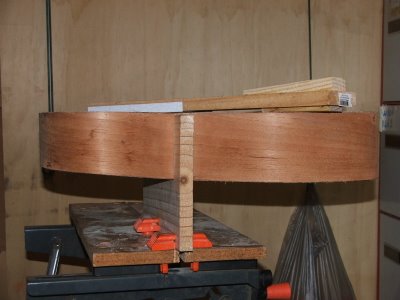
I used contact cement to attach a piece of 80 grit sandpaper to the board and then sanded back the top edge. The sanding seemed to go well however the vibration made a gap between the inner cardboard mold and the edges. I squared the ends up again and there does not appear to be any dramas.
After that I notched out the kerfing where the braces a meant to touch. The top seams to close tightly but I have no idea if the braces are still making contact with the kerfing.
I would have thought for a beginners kit that there would have been more overlay in the soundboard. When I measure 5 3/8" from the top of the sound board the mark is right at the top. There is only 1/8th of an inch allowance at the bottom. Tight.
While I had the jig saw out, I also cut the curve (best I could) for the back braces and I glued the first two into place.
Time taken : 3 hours
Tools used : chisels, jigsaw, handsaw, protractor, sandpaper, contact cement, file, rulers, clamps, glue, black and white pencil, T-square.
AU$'s spent : $19.00 on a protractor I can not use.
I did get a chance to look at the Dremels and a lot of similar tools and a few small routers and trimmers. I think I am going to settle on the Dremel and go ahead and order the precision router kit from StewMac. In relation to routing the I am (again) flipping from one choice to another. It is my latest task that I am worried about, as to whether or not I will be able to complete it properly.
At the wood show, I bought the biggest, flashest and hi tech(est) protractor that I saw. I got it home and then I found out that it did not measure below 15 degrees - great. I had a quick sulk and then got out that old plastic school protractor and made the sanding board, cutting the angel with a jigsaw. After all the thinking and planning, dumbing it down worked fairly well.

I used contact cement to attach a piece of 80 grit sandpaper to the board and then sanded back the top edge. The sanding seemed to go well however the vibration made a gap between the inner cardboard mold and the edges. I squared the ends up again and there does not appear to be any dramas.
After that I notched out the kerfing where the braces a meant to touch. The top seams to close tightly but I have no idea if the braces are still making contact with the kerfing.
I would have thought for a beginners kit that there would have been more overlay in the soundboard. When I measure 5 3/8" from the top of the sound board the mark is right at the top. There is only 1/8th of an inch allowance at the bottom. Tight.
While I had the jig saw out, I also cut the curve (best I could) for the back braces and I glued the first two into place.
Time taken : 3 hours
Tools used : chisels, jigsaw, handsaw, protractor, sandpaper, contact cement, file, rulers, clamps, glue, black and white pencil, T-square.
AU$'s spent : $19.00 on a protractor I can not use.
Saturday, August 12, 2006
Bits and Pieces
Today has been an odds and ends day. I am starting to get little parts started but I think it’s time that I pulled them all together and got back on track or I am going to start making mistakes.
Today I drew the center lines on my fingerboard and the then marked the edges. I planed up to within 5 mm of the side lines but then lost my nerve and put that away. The trust rod slides into the neck easily and because I am using the bolt on neck, there was no need to drill the hole as mentioned in the instruction manual.
I have chiseled the small braces down to nothing against the soundboard but I have no idea how big .100” is… That’s not on my conversion table so I will have to ask the internet after I finish this post.
I made the shoulder and bridge cauls as well although I think I might do them again. They are snug but not perfect. I might get Dad’s table saw out soon and make better ones.
Today I have learnt that using sharp tools (chisels) makes work neater and more professional in appearance. I will certainly be learning how to sharpen a chisel before I try to shape the diamond on the back of the neck.
I also made a caul for the back braces. Not having a ban saw, I am having a hard time working out how I going the cut the curve. I have tried using the auto body filling putty just as I did with the neck and end blocks. I have only made one so (if it works) it’ll be slow going putting the back together.
I am stuck on how to make the sanding board for the edges. How to make the 5 and 1 ½ degree angles have stumped. I only have my old high school protractor and I am not really confident that the measurements will be correct.
Tomorrow, Dad and I are going to the annual wood show, so I’ll get the chance to see lots of goodies and I might get a chance to start thinking about finishes.
Another opportunity to spend money. I did fairly well at Bunnings today, buying supplies I think I will need in the near future.
Time taken : 2 hours
Tools used : chisel, clamps, hand saw, sand paper, auto putty, hand plane, white pencil,
U$'s spent : Curves cutters (Fret snips) $14.95, wire brush $1.45, Soft faced hammer $14.85, masking tape $12.90, gaffa tape $6.40, Contact cement $6.20, sand paper $6.00
Today I drew the center lines on my fingerboard and the then marked the edges. I planed up to within 5 mm of the side lines but then lost my nerve and put that away. The trust rod slides into the neck easily and because I am using the bolt on neck, there was no need to drill the hole as mentioned in the instruction manual.
I have chiseled the small braces down to nothing against the soundboard but I have no idea how big .100” is… That’s not on my conversion table so I will have to ask the internet after I finish this post.
I made the shoulder and bridge cauls as well although I think I might do them again. They are snug but not perfect. I might get Dad’s table saw out soon and make better ones.
Today I have learnt that using sharp tools (chisels) makes work neater and more professional in appearance. I will certainly be learning how to sharpen a chisel before I try to shape the diamond on the back of the neck.
I also made a caul for the back braces. Not having a ban saw, I am having a hard time working out how I going the cut the curve. I have tried using the auto body filling putty just as I did with the neck and end blocks. I have only made one so (if it works) it’ll be slow going putting the back together.
I am stuck on how to make the sanding board for the edges. How to make the 5 and 1 ½ degree angles have stumped. I only have my old high school protractor and I am not really confident that the measurements will be correct.
Tomorrow, Dad and I are going to the annual wood show, so I’ll get the chance to see lots of goodies and I might get a chance to start thinking about finishes.
Another opportunity to spend money. I did fairly well at Bunnings today, buying supplies I think I will need in the near future.
Time taken : 2 hours
Tools used : chisel, clamps, hand saw, sand paper, auto putty, hand plane, white pencil,
U$'s spent : Curves cutters (Fret snips) $14.95, wire brush $1.45, Soft faced hammer $14.85, masking tape $12.90, gaffa tape $6.40, Contact cement $6.20, sand paper $6.00
Thursday, August 10, 2006
Top braces on
Today the last of the braces for the top went on and they are now ready for shaping. The soundboard has certainly gained weight - a lot heavier than I expected. Although I've got nothing to compare it with, I am happy with the result.

While the last of the braces were in clamps I trimed the headstock overlay, drill out the centres and filed and sanded the basic shape. Obviously I need more sanding and I have to work out how much room the strings need, but it's coming along okay. I found that it was easiest to form the shape by wrapping a sheet of sand paper around a thick texta. The round shape sanding surface made it easier to form the shape required.

Time to start slowing down I think. Perhaps I am getting a bit of confidence but I feel like I am going too fast and backing myself too much. Tonight I dragged the file right across the top of the head stock overlay. I've got no doubt that it'll sand out very quickly but still, I'm getting to the stage where my mistakes will show up - they won't be inside the box.
Time taken : 2 hours
Tools used : Glue, rags, clamps, craft knife, file, sand paper and texta.
AU$'s spent : Nil

While the last of the braces were in clamps I trimed the headstock overlay, drill out the centres and filed and sanded the basic shape. Obviously I need more sanding and I have to work out how much room the strings need, but it's coming along okay. I found that it was easiest to form the shape by wrapping a sheet of sand paper around a thick texta. The round shape sanding surface made it easier to form the shape required.
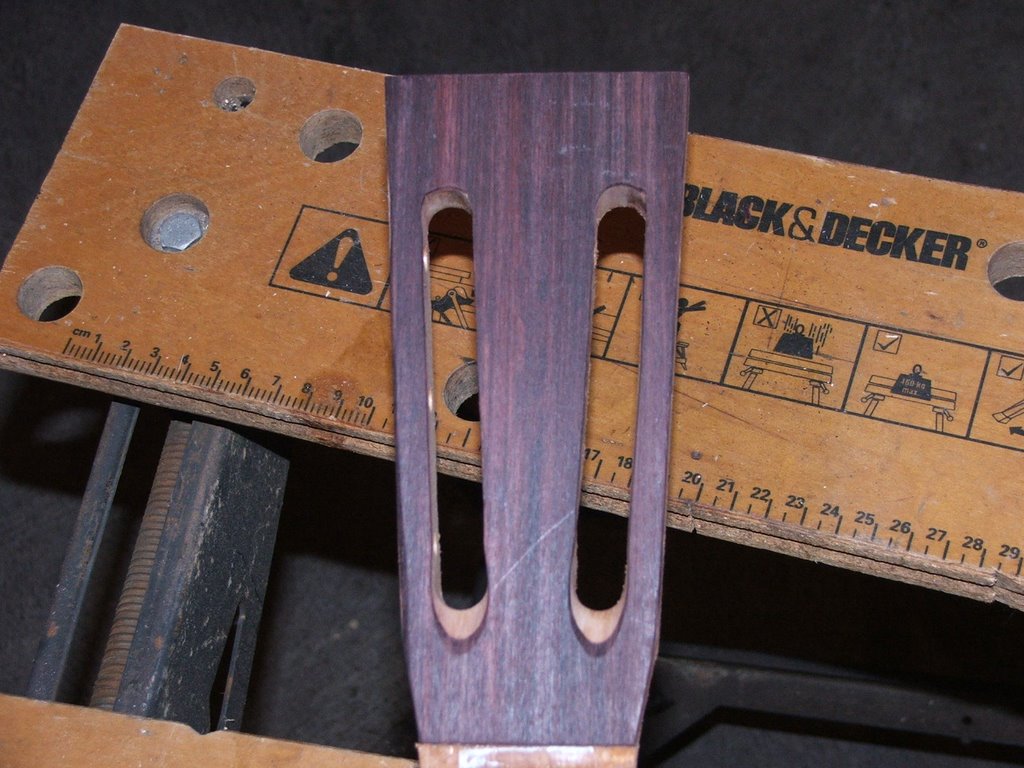
Time to start slowing down I think. Perhaps I am getting a bit of confidence but I feel like I am going too fast and backing myself too much. Tonight I dragged the file right across the top of the head stock overlay. I've got no doubt that it'll sand out very quickly but still, I'm getting to the stage where my mistakes will show up - they won't be inside the box.
Time taken : 2 hours
Tools used : Glue, rags, clamps, craft knife, file, sand paper and texta.
AU$'s spent : Nil
Wednesday, August 09, 2006
Braces and Headstock
I’ve continued with gluing the braces to the soundboard and it seems like everything is going along as planned. Obviously my progress is limited by the number of clamps that I have available and the amount of surface area on which to place those clamps.
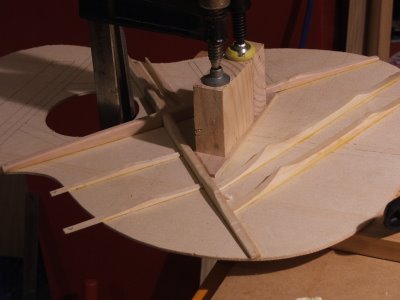
Tonight I made a brief start on my neck, or should I say the headstock. I glued the overlay onto the headstock. I have a little concern over the glue squeeze out on the inside of the headstock, it was only once the cauls were in place that I thought about it. If I was to do it again, I’d consider packing the inside of the head with some paper or something to absorb most of the glue.


Time taken : 2 hours
Tools used : glue, clamps, scrap wood, tape, cardboard, ruler, rags
AU$'s spent : Nil
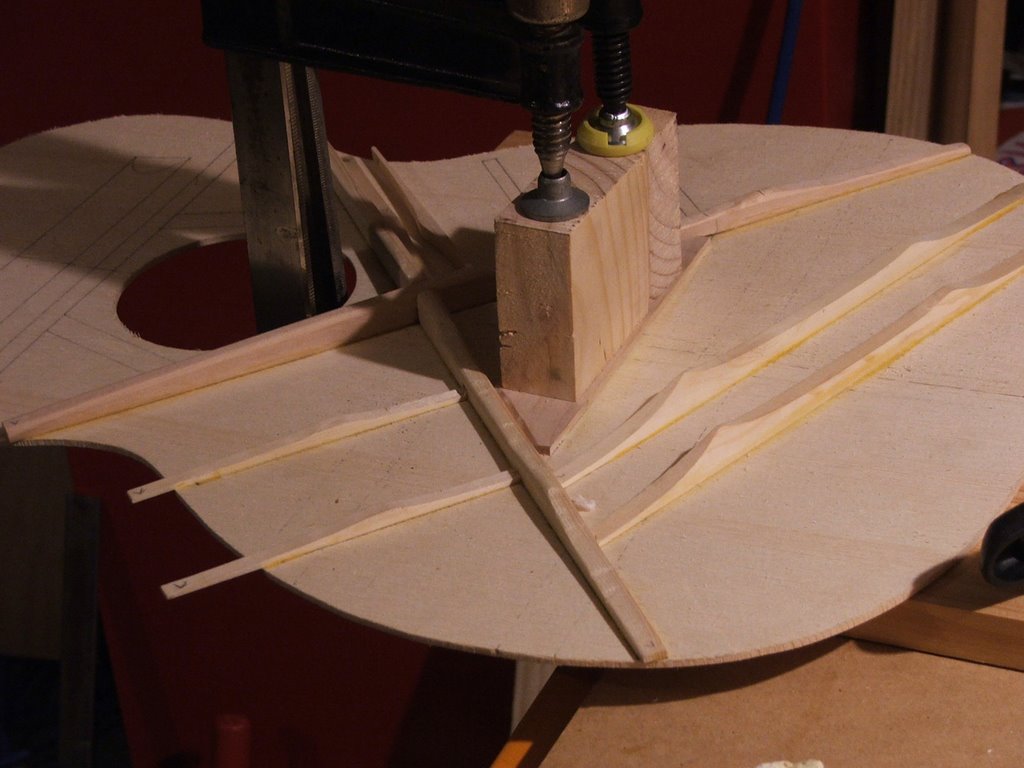
Tonight I made a brief start on my neck, or should I say the headstock. I glued the overlay onto the headstock. I have a little concern over the glue squeeze out on the inside of the headstock, it was only once the cauls were in place that I thought about it. If I was to do it again, I’d consider packing the inside of the head with some paper or something to absorb most of the glue.


Time taken : 2 hours
Tools used : glue, clamps, scrap wood, tape, cardboard, ruler, rags
AU$'s spent : Nil
Tuesday, August 08, 2006
It's just like golf
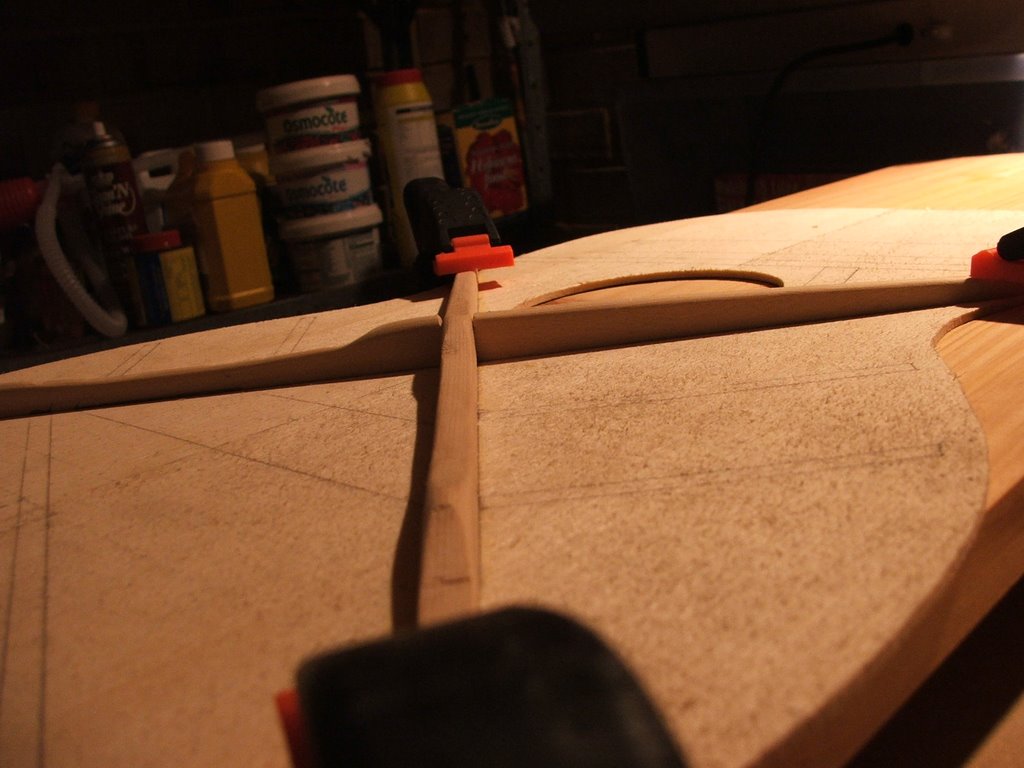
I have worked out that this guitar making business is like golf. I used to play a little and I remember that you would spend hours and hours slicing and hooking all over the place and then you'd get that one good shot. The perfect drive or the 15 foot putt. That shot would convince you that you were capable of playing like a pro and get you back next week.

Tonight I made the second set of cross braces, shaped them and then slotted the reliefs for the other braces and bridge plate. I am on fire. It all felt good and I really enjoyed my time tonight. Now I am not saying that it is perfect - but it's mine. After last nights last minute dash to have the old braces taken off I felt like I was going in the right direction again.

Time taken : 3.5 hours
Tools used : sandpaper, coping saw, Japanese saw, spring and normal clamps, craft knife, pencil, ruler, T Square, rags.
AU$'s spent : Nil
Monday, August 07, 2006
I make mistakes for you all to learn
Well at least that is my story and I am sticking to it.
A couple of posts ago I mentioned that I had a couple of pieces of wood that had "Glue this side" written on them. I scratched my head, laid everything out on the paper, watched the video and even read the manual - it just did not sink in.
I had formed the impression that the manual for the dreadnought kit doubled as the OOO manual as the dovetail does for the bolt on. Wrong.
So after I worked out, this brace goes there, this one goes there - they look just like the picture in the book and on the video I had come to the conclusion that these two bits of wood were mistakenly packed or something... There was enough pieces in the top brace kit, I didn't need anymore.
Thank goodness that I speared in an email to StewMac asking the question. Tonight - AFTER - I had glued the dreadnought cross braces to my OOO soundboard with great detail. Erick replied to my email, letting me know that the bits of wood were the OOO braces to be substituted for the dreadnought braces.
I go back now and read the instruction manual again and it all appears so clear. I must have had a brain fizz and switched off when I saw the word Dreadnought - I must have missed the whole paragraph.
I feel stupid and a little unnerved but the glue had not gone off totally - I managed to get the braces up without doing damage to the top. At least I've answered my earlier question about how much pressure I need to settle the cross brace. Another couple of hours and those incorrect braces would never have come up.
Note for those that follow : There are an extra set of braces added to the OOO kit. Do not use the ones in the package.
At least now I get another chance at making those reliefs into the cross braces. It's all good.
Time taken : 15 minutes (to remove the braces)
Tools used : Hair dryer, very thin paint scraper
AU$'s spent : Nil - but it could have been worse.
A couple of posts ago I mentioned that I had a couple of pieces of wood that had "Glue this side" written on them. I scratched my head, laid everything out on the paper, watched the video and even read the manual - it just did not sink in.
I had formed the impression that the manual for the dreadnought kit doubled as the OOO manual as the dovetail does for the bolt on. Wrong.
So after I worked out, this brace goes there, this one goes there - they look just like the picture in the book and on the video I had come to the conclusion that these two bits of wood were mistakenly packed or something... There was enough pieces in the top brace kit, I didn't need anymore.
Thank goodness that I speared in an email to StewMac asking the question. Tonight - AFTER - I had glued the dreadnought cross braces to my OOO soundboard with great detail. Erick replied to my email, letting me know that the bits of wood were the OOO braces to be substituted for the dreadnought braces.
I go back now and read the instruction manual again and it all appears so clear. I must have had a brain fizz and switched off when I saw the word Dreadnought - I must have missed the whole paragraph.
I feel stupid and a little unnerved but the glue had not gone off totally - I managed to get the braces up without doing damage to the top. At least I've answered my earlier question about how much pressure I need to settle the cross brace. Another couple of hours and those incorrect braces would never have come up.
Note for those that follow : There are an extra set of braces added to the OOO kit. Do not use the ones in the package.
At least now I get another chance at making those reliefs into the cross braces. It's all good.
Time taken : 15 minutes (to remove the braces)
Tools used : Hair dryer, very thin paint scraper
AU$'s spent : Nil - but it could have been worse.
What am I doing?
It occurred to me this evening that I have no idea whatsoever as to what I am doing. It was as something as simple as putting the clamps onto the cross brace that I was reminded that I am not a master craftsman. How tight to you put the clamps on? The soundboard is such a thin piece of wood that if as soon as you put pressure on to the clamps, it bends. How much pressure does the glue need to form a sound bond? How much down force do those Gobar desks put on the braces... should I have used once of those?
Even the weight of the clamps has caused the soundboard to form a shape. I just don't know if the change in shape is a permanent fixture or not.
Still it can't be all my fault, I've notice that ever since I have put the rosette in place, the soundboard has curved slightly. I just hope that when all is said and done, the sides will force the top, the top will pursueded the back..etc and everything will be fine .
Time taken : 1 hour
Tools used : glue, 4 spring clamps, 4 clamps, cardboard/scrap wood etc for cauls
AU$'s spent : Nil
Even the weight of the clamps has caused the soundboard to form a shape. I just don't know if the change in shape is a permanent fixture or not.
Still it can't be all my fault, I've notice that ever since I have put the rosette in place, the soundboard has curved slightly. I just hope that when all is said and done, the sides will force the top, the top will pursueded the back..etc and everything will be fine .
Time taken : 1 hour
Tools used : glue, 4 spring clamps, 4 clamps, cardboard/scrap wood etc for cauls
AU$'s spent : Nil
Sunday, August 06, 2006
Glue this side?
Well, the last of the kerfing is in place. The patch up is not pretty but it is firm and I think it'll do the job. Gluing the kerfing on was really an easy step. I spread the glue the whole length of the kerfing and then put a peg right at the end, this way the kerfing was held up of the cardboard mold while I set the rest in place.

It looks a hole heap better when you don't know exactly where the mistakes are.

Tonight I started putting the top braces together. I was on fire for a little while and then my hands remembered that I am not very experienced at working with wood. The join that I made in the two cross braces was perfect, most of it was done with sandpaper on a board that was right thickness. Then I started making the the reliefs into the cross braces - these are not pretty.

In other news, I am a little confused. I sorted out the issue that StewMac have an error in their manual where they list the items that should be in the kit. The photos for the top and back braces are around the wrong way and they don't tell you that you have to cut one of the braces, to make the three pieces around the sound hole.
The one I can not work out in why I have two curved braces that have "glue this side" written on them in red ink. I've sent StewMac and email asking for clarification - I'm not starting to glue the braces until I find out what they are.
Time taken : 2.5 hours
Tools used : glue, pegs, ruler, pencil, spring clamps, Japanese saw, chisel, craft knife, sand paper, wood files.
AU$'s spent : Nil
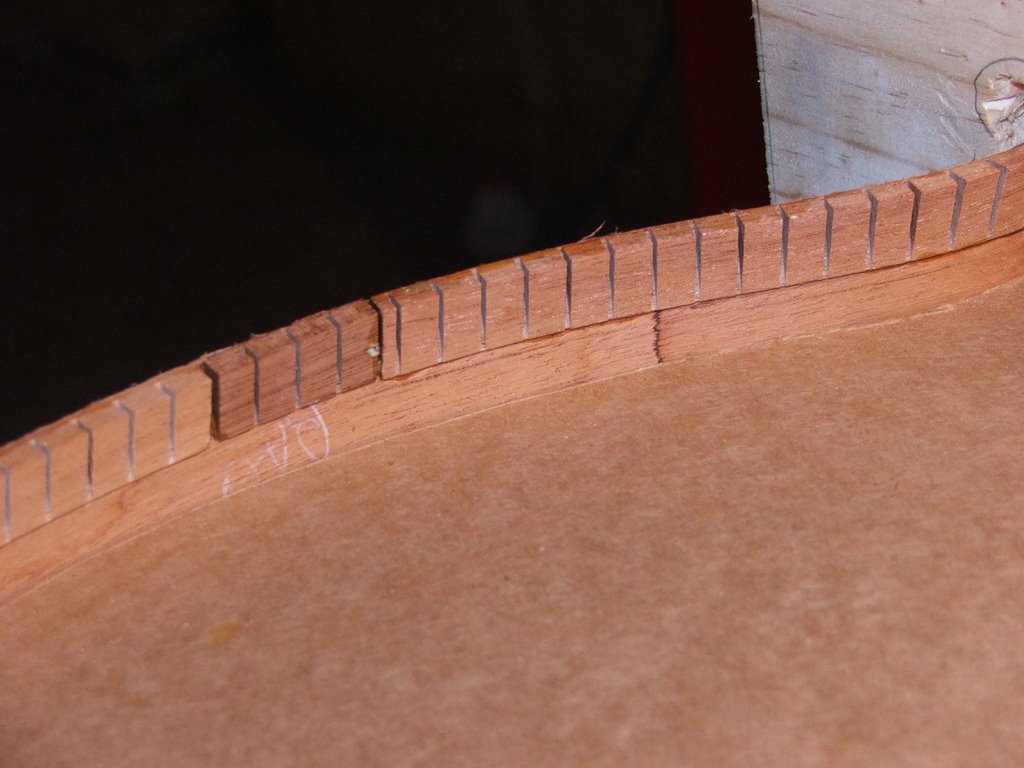
It looks a hole heap better when you don't know exactly where the mistakes are.
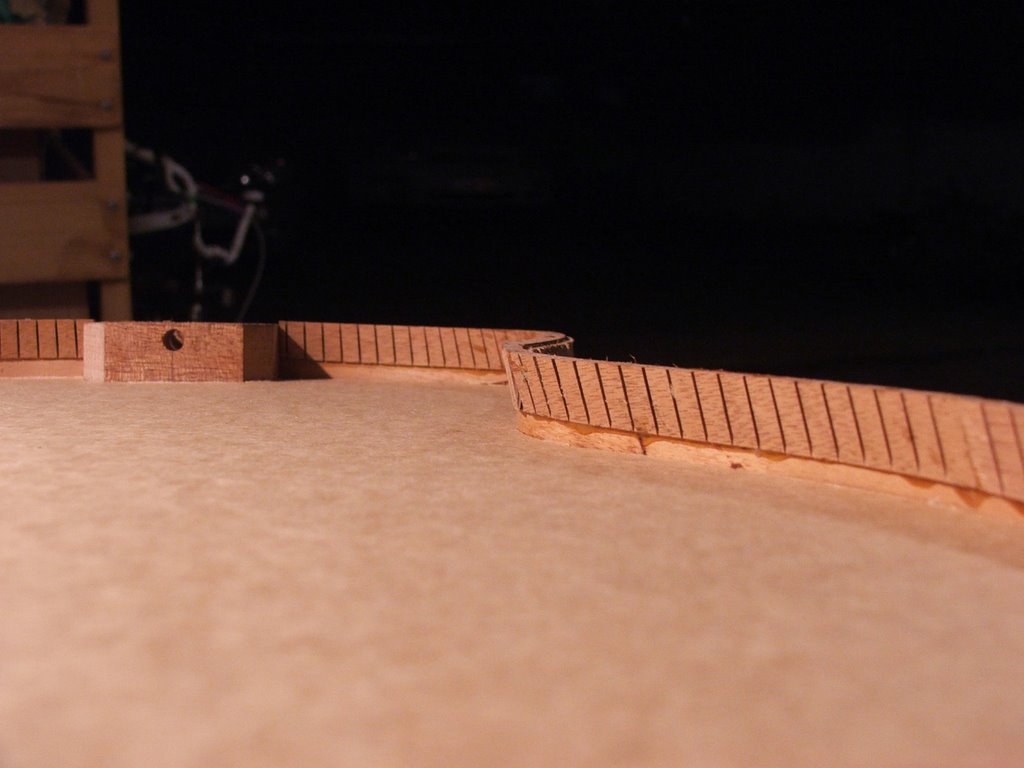
Tonight I started putting the top braces together. I was on fire for a little while and then my hands remembered that I am not very experienced at working with wood. The join that I made in the two cross braces was perfect, most of it was done with sandpaper on a board that was right thickness. Then I started making the the reliefs into the cross braces - these are not pretty.

In other news, I am a little confused. I sorted out the issue that StewMac have an error in their manual where they list the items that should be in the kit. The photos for the top and back braces are around the wrong way and they don't tell you that you have to cut one of the braces, to make the three pieces around the sound hole.
The one I can not work out in why I have two curved braces that have "glue this side" written on them in red ink. I've sent StewMac and email asking for clarification - I'm not starting to glue the braces until I find out what they are.
Time taken : 2.5 hours
Tools used : glue, pegs, ruler, pencil, spring clamps, Japanese saw, chisel, craft knife, sand paper, wood files.
AU$'s spent : Nil
Note to self
When you clamp the rosette between two boards overnight. Don't forget the wax paper.
Time taken : Nil
Tools used : Obviously not a brain
AU$'s spent : Nil
Time taken : Nil
Tools used : Obviously not a brain
AU$'s spent : Nil
Saturday, August 05, 2006
Moving right along
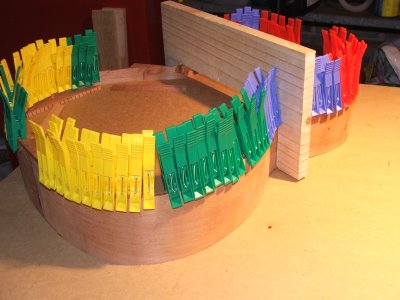
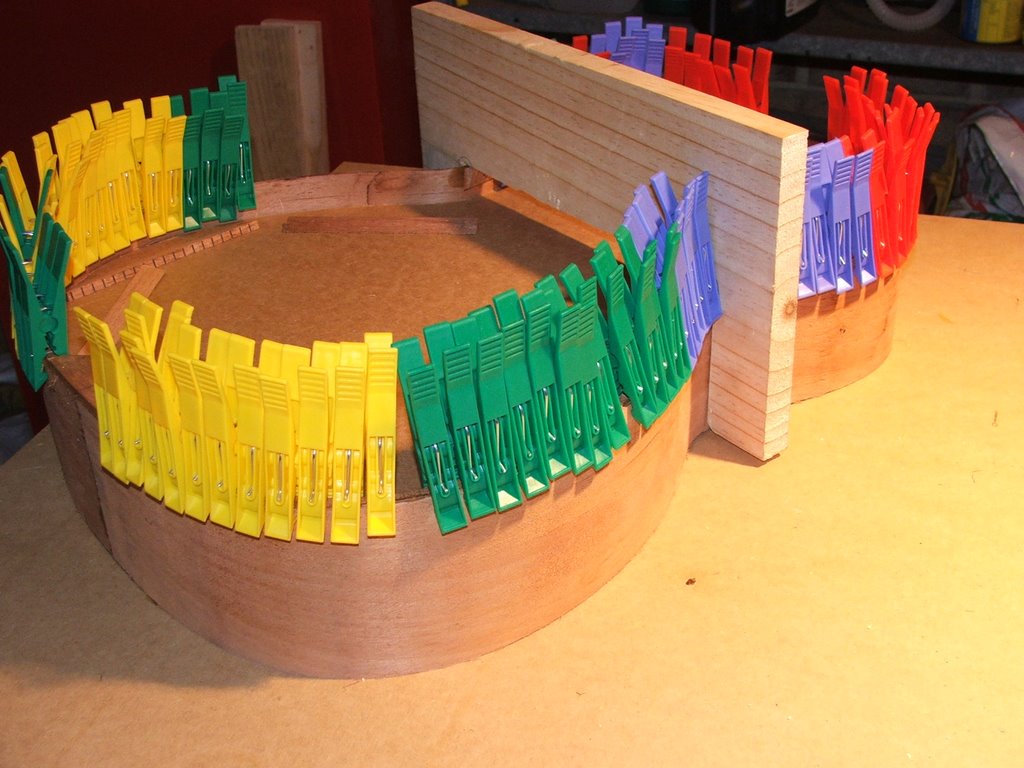
It has been a fairly productive evening. I went to the shops and picked up a packet of pegs. Believe it or not, I could not find wood pegs anywhere so I had to settle for plastic ones - they appear to have fairly strong spring so they should do the job.
I learnt a valuable lesson tonight, a mistake I don't intend to repeat. Everywhere you read, people tell you to practice clamping before you glue. I found out tonight that this does not apply to kerfing. I had a couple of dry runs and worked out that it is better to start at the tail, otherwise the place where the next strip starts in in the waist. It appears easier to start at either block and work towards the middle. Anyway, bending the kerfing and moving it around obviously made it weak because is snapped. I have a 2-3 inch gap that needs to be patched up.
I also installed the rosette. This is the first time where I started to see how this instrument is going to be full of little tell tale signs that it was made by me, good or bad. I made the joins in the rosette as neat as I could however they appear quite messy close up.

From a distance I you might not be able to notice

The rosette was so tight. I don't think I actually needed to glue it in there. I am sure it won't be coming out in a hurry.
Time taken : 1.5 hours
Tools used : 92 plastic pegs, glue, Japanese saw, ruler, chisel
AU$'s spent : $12.00 for the pegs
I learnt a valuable lesson tonight, a mistake I don't intend to repeat. Everywhere you read, people tell you to practice clamping before you glue. I found out tonight that this does not apply to kerfing. I had a couple of dry runs and worked out that it is better to start at the tail, otherwise the place where the next strip starts in in the waist. It appears easier to start at either block and work towards the middle. Anyway, bending the kerfing and moving it around obviously made it weak because is snapped. I have a 2-3 inch gap that needs to be patched up.
I also installed the rosette. This is the first time where I started to see how this instrument is going to be full of little tell tale signs that it was made by me, good or bad. I made the joins in the rosette as neat as I could however they appear quite messy close up.

From a distance I you might not be able to notice
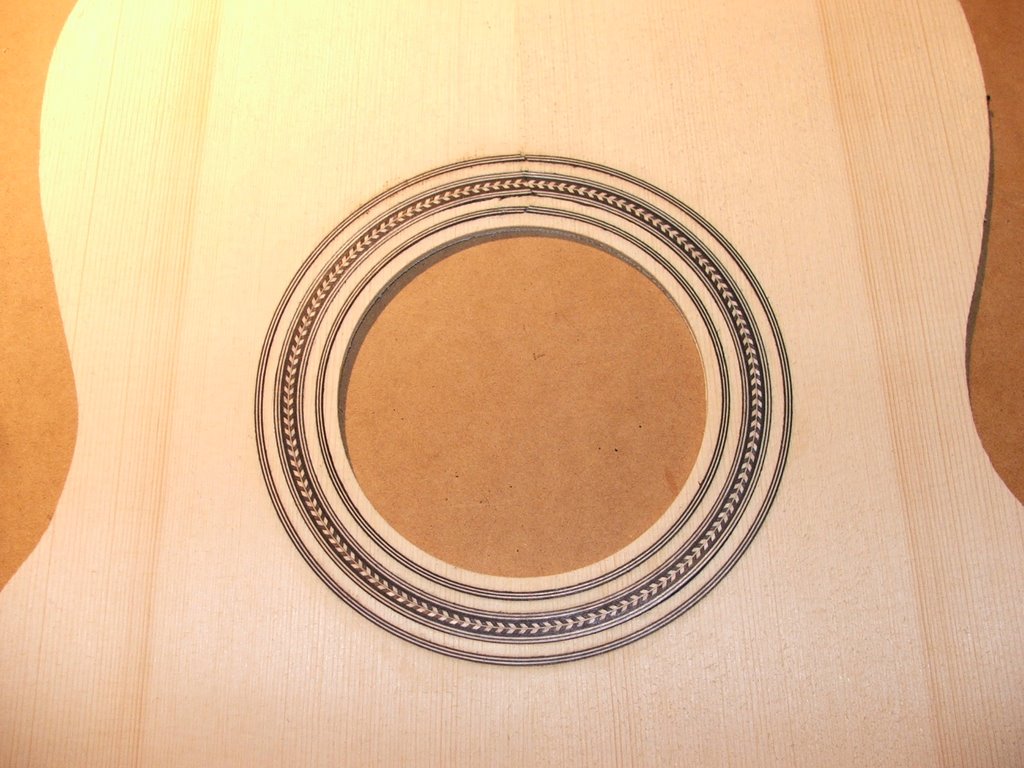
The rosette was so tight. I don't think I actually needed to glue it in there. I am sure it won't be coming out in a hurry.
Time taken : 1.5 hours
Tools used : 92 plastic pegs, glue, Japanese saw, ruler, chisel
AU$'s spent : $12.00 for the pegs
Thursday, August 03, 2006
The mold is on
After dinner I cut the cardboard required to make the mold and then headed down to the shed, cut some blocks of wood and then started putting the mold together.
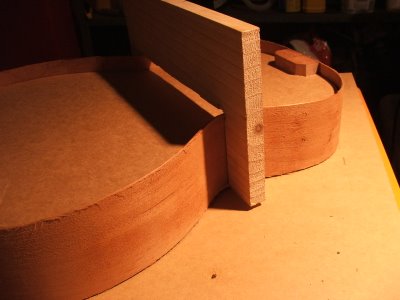
I had been dreading pushing the waist clamp over the sides for a while. As it ended, I felt that it was too tight the first time and then I too a few minutes to file and sand back. The next time, the waist slid firmly over the sides - it felt right.
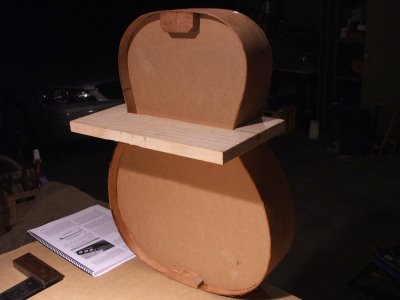
The sides do not exactly follow the cardboard sides but when I messure the length and widths from the plan to my actual shape, they are fairly close so I am happy.
I know I really haven't done anything to date - but it's impressive to stand back and think - that's starting to look like a guitar.
Time taken : 1 hour
Tools used : Stanley trimmer/craft knife, hand saw, wood, super glue, sand paper, wood file
AU$'s spent : Nil

I had been dreading pushing the waist clamp over the sides for a while. As it ended, I felt that it was too tight the first time and then I too a few minutes to file and sand back. The next time, the waist slid firmly over the sides - it felt right.
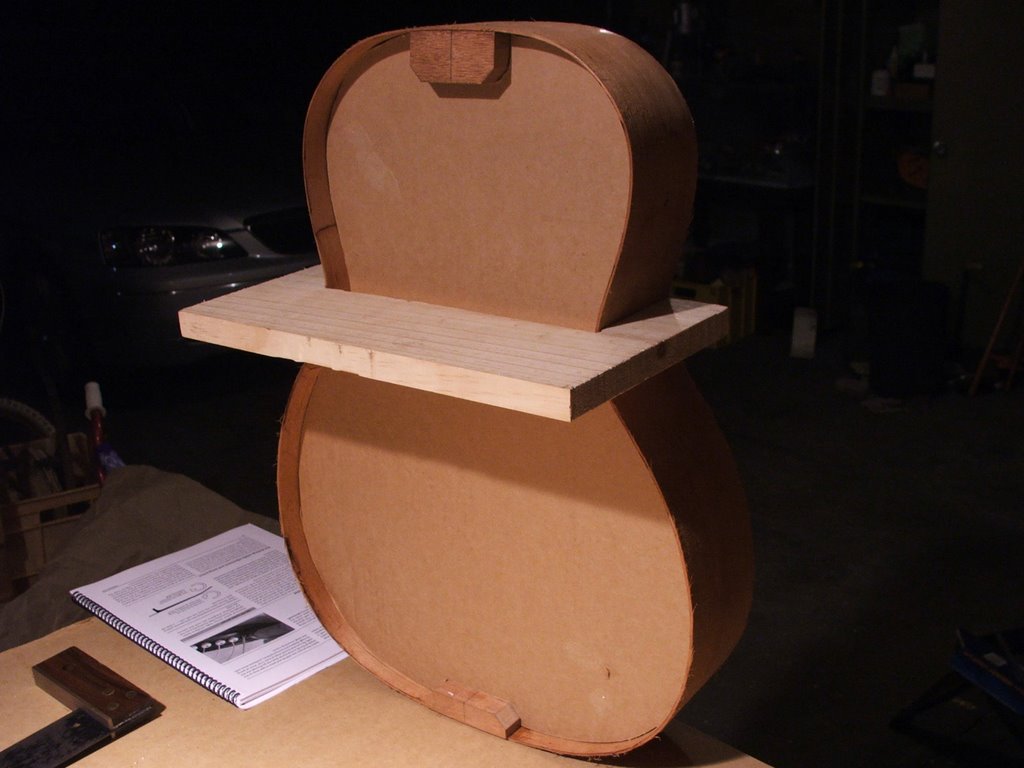
The sides do not exactly follow the cardboard sides but when I messure the length and widths from the plan to my actual shape, they are fairly close so I am happy.
I know I really haven't done anything to date - but it's impressive to stand back and think - that's starting to look like a guitar.
Time taken : 1 hour
Tools used : Stanley trimmer/craft knife, hand saw, wood, super glue, sand paper, wood file
AU$'s spent : Nil
Bugger...
I'm not sure how big a hurdle this is going to cause. Today, I took all the clamps off and found that somehow I must have let the ends slip apart from each other before I clamped them. I am left with a gap between the ends at the neck end. I am not really sure if this is going to cause me that much drama as this area of wood is going to be cut away in order to install the neck. The join appears solid but I wonder if this small error with cause problems with the sides being twisted slightly.

From what I can tell, I may be able to get away with this mistake. I'll throw it open to the forum and see what my brains trust have to offer.
On the flip side of the coin, I am happy with the join at the end.

I think I will put the frame together and await my answer - Hopefully the majority say that I'll be okay.
Time taken : Nil
Tools used : Nil
AU$'s spent : Nil
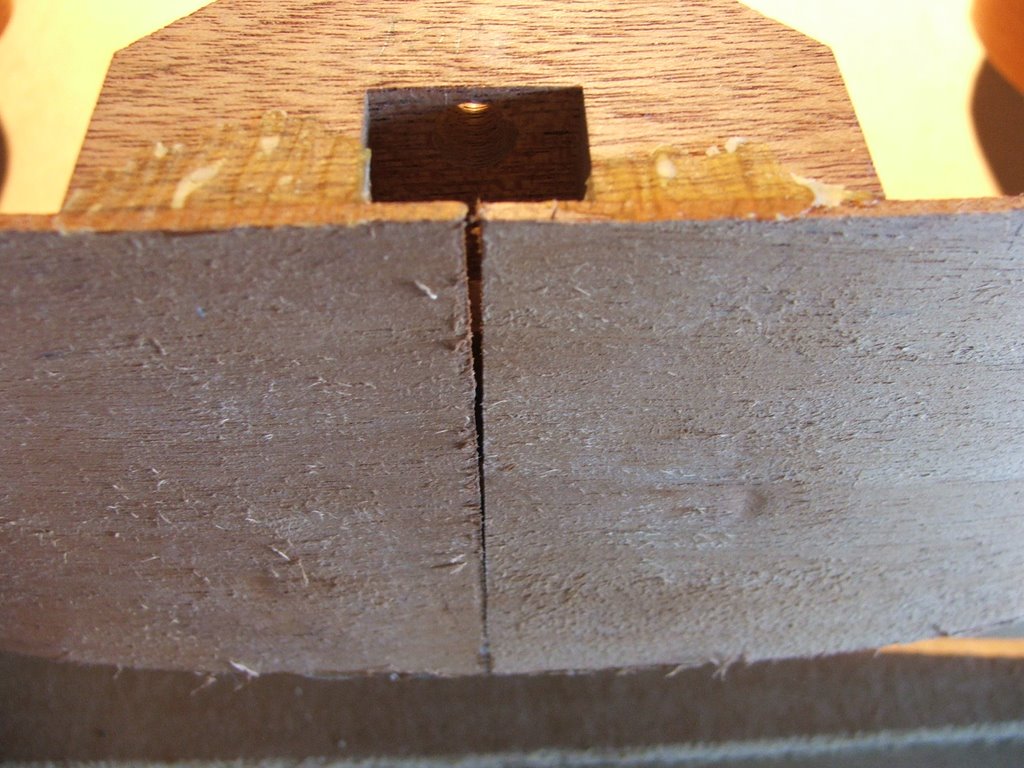
From what I can tell, I may be able to get away with this mistake. I'll throw it open to the forum and see what my brains trust have to offer.
On the flip side of the coin, I am happy with the join at the end.
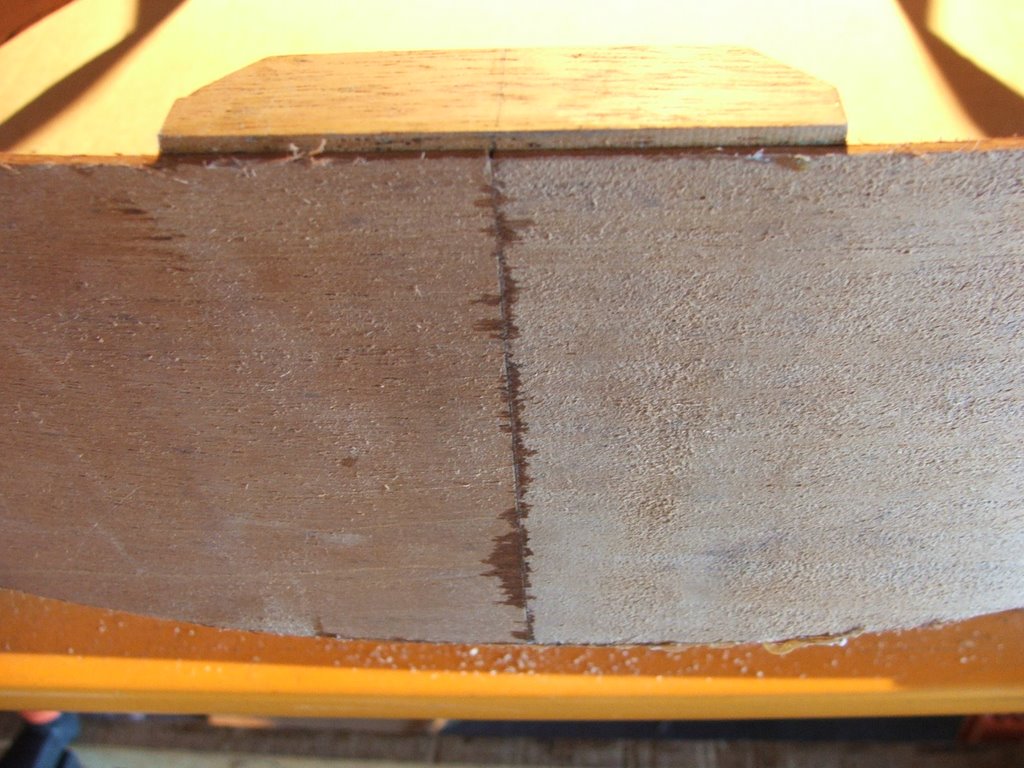
I think I will put the frame together and await my answer - Hopefully the majority say that I'll be okay.
Time taken : Nil
Tools used : Nil
AU$'s spent : Nil
Wednesday, August 02, 2006
The sides are on
Today I had the luxury of starting work late and being such a nice day, I decided to get inside the shed and get going with the glue. I found it was a lot easier to adjust the sides once the weighted board was in place across the middle.
I had a few dry runs at each end and then started with the glue. All got very slippery when you add wax paper and glue but I think that it went together quite well.

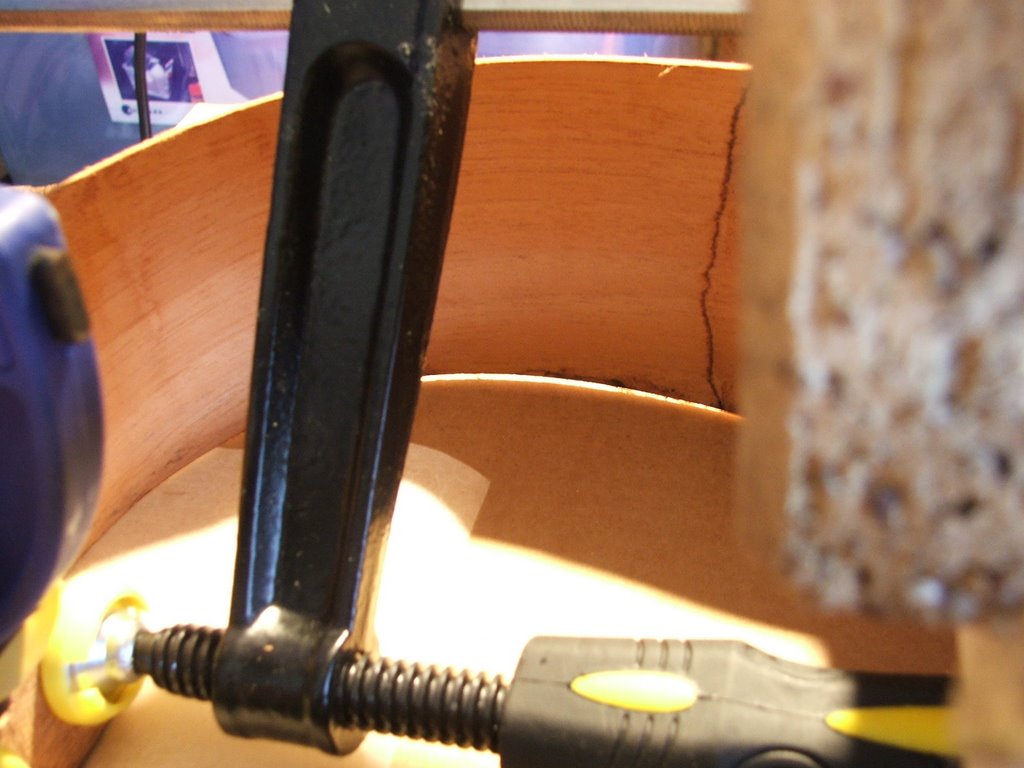
My only concern is there is a small amount of light now coming through under one of the edges, as in the edge has twisted slightly. I don't think I have a huge need to be worried, as best I can tell the edges are lined up with the centre lines. I am working on the theory that all will come back into alignment once the top, back and braced go on. Time will tell.
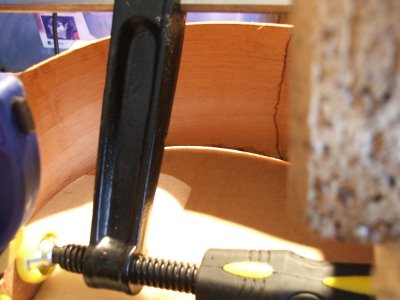
Time taken : An hour
Tools used : 6 clamps, glue, wax paper,
AU$'s spent : Nil
I had a few dry runs at each end and then started with the glue. All got very slippery when you add wax paper and glue but I think that it went together quite well.
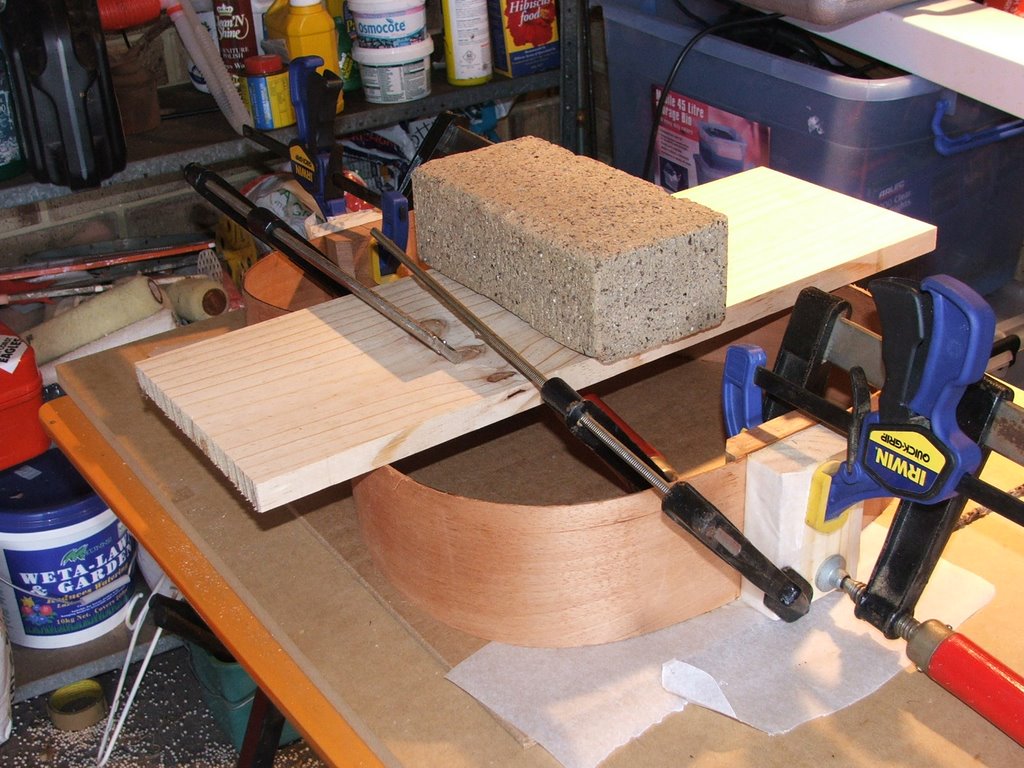
My only concern is there is a small amount of light now coming through under one of the edges, as in the edge has twisted slightly. I don't think I have a huge need to be worried, as best I can tell the edges are lined up with the centre lines. I am working on the theory that all will come back into alignment once the top, back and braced go on. Time will tell.
Time taken : An hour
Tools used : 6 clamps, glue, wax paper,
AU$'s spent : Nil
Tuesday, August 01, 2006
Construction of braces
When I sanded back the auto putty it went to a point where the toe of the caul was back to bare wood so I just made up new putty and made a new curve, using the end caul.
After that, I got busy making the U shaped brace for the sides once I glue the ends up. I made it smaller than the template size, just slightly and I with an I also had a few dry runs at gluing the ends up. It is a lot harder to do than it looks on the video. I am starting to worry that I will muck up the simplest of tasks.
I might be getting a bit ahead of myself but I wanted to keep going so I pulled out the top and back to start tracing the outline of the braces. I seemed at first that the top was not long enough, the outline on the template barely fit onto the wood supplied. I used a lawyers bobkin to pierce a hole in the template. In hindsight I might have punched the holes through in the opposite direction first, that way I am not pushing hard onto the wood.

My mistake for today - the dotted lines on the StewMac template - are for the back... there is no need to trace them onto the top...
Time taken : 2 Hours
Tools used : Auto putty, scrap wood, pencil, lawyers bobkin, pencil sharpener, a long ruler, vice, electric drill, hand saw
AU$'s spent : Nil
After that, I got busy making the U shaped brace for the sides once I glue the ends up. I made it smaller than the template size, just slightly and I with an I also had a few dry runs at gluing the ends up. It is a lot harder to do than it looks on the video. I am starting to worry that I will muck up the simplest of tasks.
I might be getting a bit ahead of myself but I wanted to keep going so I pulled out the top and back to start tracing the outline of the braces. I seemed at first that the top was not long enough, the outline on the template barely fit onto the wood supplied. I used a lawyers bobkin to pierce a hole in the template. In hindsight I might have punched the holes through in the opposite direction first, that way I am not pushing hard onto the wood.
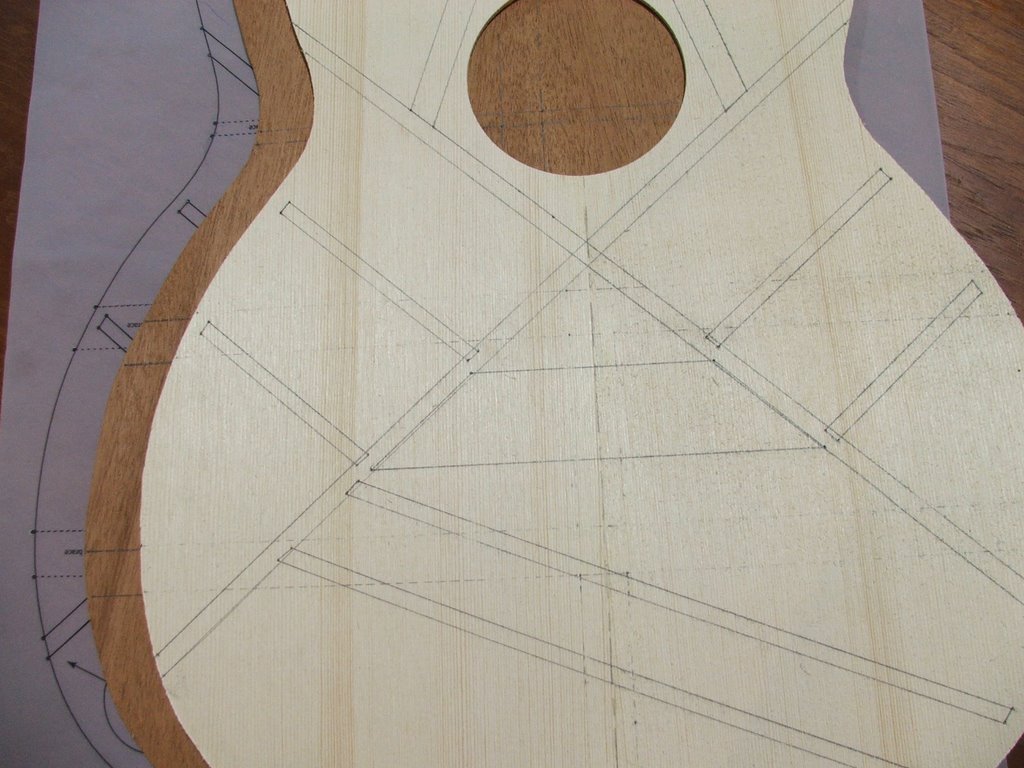
My mistake for today - the dotted lines on the StewMac template - are for the back... there is no need to trace them onto the top...
Time taken : 2 Hours
Tools used : Auto putty, scrap wood, pencil, lawyers bobkin, pencil sharpener, a long ruler, vice, electric drill, hand saw
AU$'s spent : Nil
Subscribe to:
Posts (Atom)
