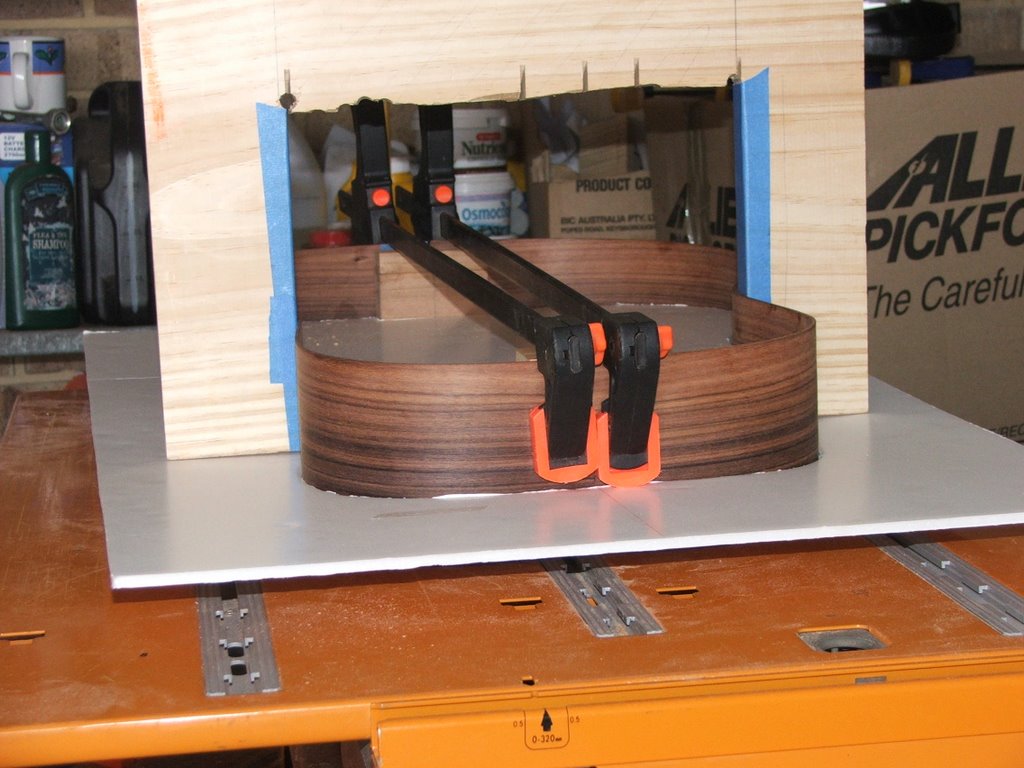
Another day, I just don’t know if I am making the right steps. I made the curved sanding bars and began on the edges. I really didn’t like the pressure/vibration that this method put into the sides. Not using a full external mold, I don’t feel there is enough support.
I found that the sanding “rolled” up hill at the blocks, leaving a peak and that the sanding was uneven. I am not convinced on the curved board method. I did not
Next build I will take the time and effort to construct an external mold.
This afternoon, I glued the kerfing to the back, tomorrow will be the front and then I’ll start on the braces.
Time taken : 3 hours
Tools used : sanding curve, rulers, chisel, pencils, chalk, clamps
AU$'s spent : nil
Wednesday, December 27, 2006
Tuesday, December 26, 2006
Christmas catch up
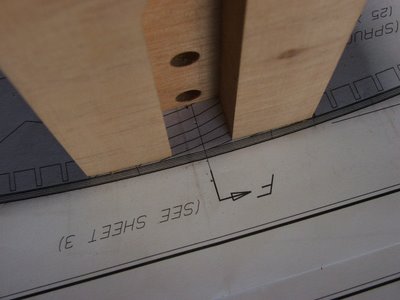
Today, I found some time away from the christmas toys and food and got down into the shed, listening to the cricket and working on the guitar. I am all over the place at the moment and all over that mistake I made on the end block. My end block was exactly 6mm too short, funny really as my saw has a 3mm wide blade and I made two cuts. I used a couple of pieces of mahogany that I had left over from the OOO to build up the height of the block. As you can see, my end block has slices all the way through it. I am not overly worried really, I have no idea what effect these "fault lines" will have on the final product, I hope none.

I also trimmed my sides. I found that I was not getting the results with a plane so I sharpened up the chisels and that made very light work of getting the sides down. My drama here was after working out the error on the tail block, I didn't trim the neck block. Had to chisel a few millimetres off there.

Time taken : 2 hours
Tools used : plane, chisel, sand paper, glue, clamps, rulers, pencils
AU$'s spent : Nil
Wednesday, December 20, 2006
Darn Hurdles
This one was suppose to be easier. Although I am finding the step of brace construction and radiusing the sides quite difficult. am struggling.
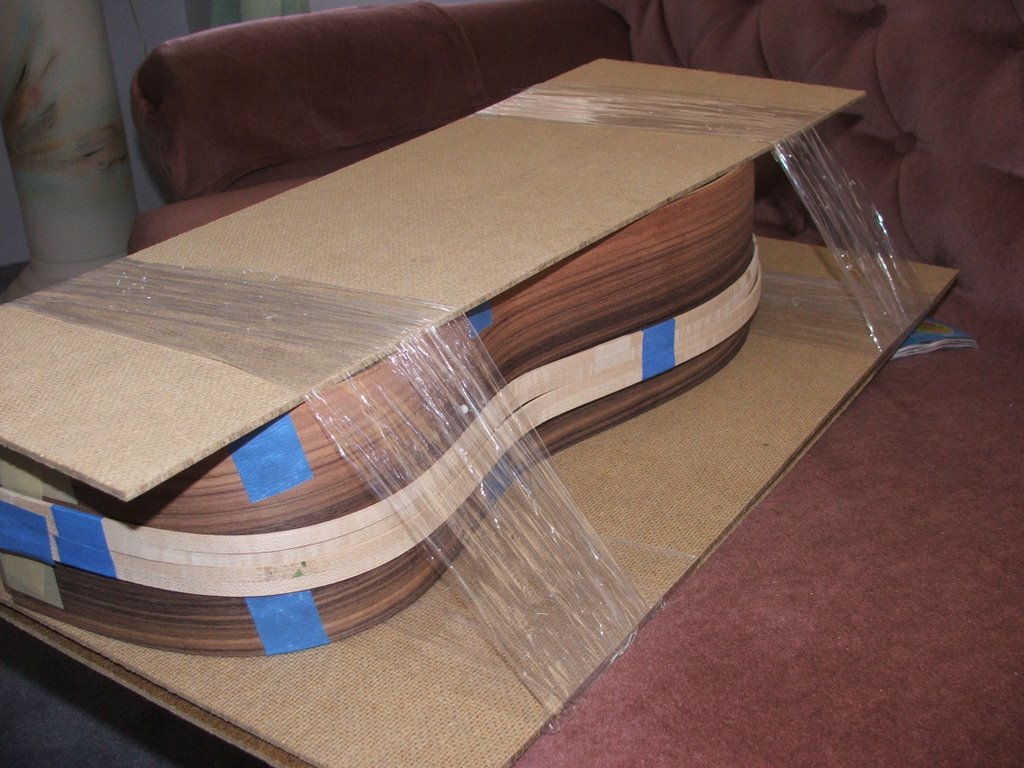
During my planning phase, I settled on simply making a “slice” of a sanding dish, as used by Bill Corey, instead of buying a couple of sanding dishes ($US 150.00 + postage). I have tried using wire (metal memory-curled up), extension cord (too heavy), fishing line and string (stretched) all in failed efforts to trace a 30 foot and 15 foot radius to a length of pine.
One of my first efforts seemed to be working out okay – When I finished I had two curves which were basically the same and uneven.
I pulled out the dreadnought cross brace that was included in my Stewmac OOO kit and traced that onto the board and I and happy to use that curve for the top. That leaves just the 15 foot radius.
Anyone got ideas? Any mathematical wizards out there that can work this out? Any one know where I could download a template?
Time taken : a few hours
Tools used : items mentioned above, jigsaw, sand paper, wood file, scraper.
AU$'s spent : $6.00 for the pine
Sunday, December 17, 2006
My Latest Mistake
Well, I have officially started – and made further mistakes.

I simply used the curved cauls that I made for my Stewmac kit as sanding blocks and curved the face of both the neck block and the end block. The curve is almost exactly the same, certainly a better result than I would have gotten with my eye alone. I knew there was a good reason why I never throw anything away.
So at the end of the weekend, I get to the point where I want to glue the blocks to the sides. I glued on the neck block and as I was clearing away the glue squeeze out, I noticed that I had left the masking tape on the inside on the edge. Effectively, I had glued the block to the tape and therefore sticky taped my side to the guitar edge. Gotta love bright blue masking tape, if I hadn’t have seen the edge sticky out I might have made it days down the track before I found out. Obviously in the mad rush to pull everything apart again, I don't have time to photograph it.
Anyways, I have glued my blocks on and we're underway again.
Time taken : 3 hours
Tools used : LMI white glue, clamps, sandpaper, pencil, T square, wax paper, rulers
AU$'s spent :
I simply used the curved cauls that I made for my Stewmac kit as sanding blocks and curved the face of both the neck block and the end block. The curve is almost exactly the same, certainly a better result than I would have gotten with my eye alone. I knew there was a good reason why I never throw anything away.

So at the end of the weekend, I get to the point where I want to glue the blocks to the sides. I glued on the neck block and as I was clearing away the glue squeeze out, I noticed that I had left the masking tape on the inside on the edge. Effectively, I had glued the block to the tape and therefore sticky taped my side to the guitar edge. Gotta love bright blue masking tape, if I hadn’t have seen the edge sticky out I might have made it days down the track before I found out. Obviously in the mad rush to pull everything apart again, I don't have time to photograph it.
Anyways, I have glued my blocks on and we're underway again.
Time taken : 3 hours
Tools used : LMI white glue, clamps, sandpaper, pencil, T square, wax paper, rulers
AU$'s spent :
Saturday, December 16, 2006
The first mistake
Well I made my first decent blue today... more on that in a minute.
Since getting the kit, I have bought some foam boards from Office Works and cut out both and internal and external forms, following the LMI dreadnought plan. I have decided to use the StewMac method as I don't think my little Dremel would stand up to all that routing.
So I have a waist clamp in place and I think it will all form something close to the shape that it is suppose to take.
Now, here comes the muck up. LMI do not provide and instruction manual, however they do supply a DVD created by Robert O'Brien in which he makes a LMI OM guitar. So I watch the DVD, I listen and I take note of the steps.
I follow Robert's instruction and cut the end block slightly taller than 100 millimeters. Then I work out that the Dreadnought end block is not to be trimmed to 100... I glued the piece I cut off back on the top. In I would have lost 6 millimeters because I may two cuts and the blade is 3 mill wide.
Time taken :
Tools used :
AU$'s spent :
Monday, December 11, 2006
It's Arrived
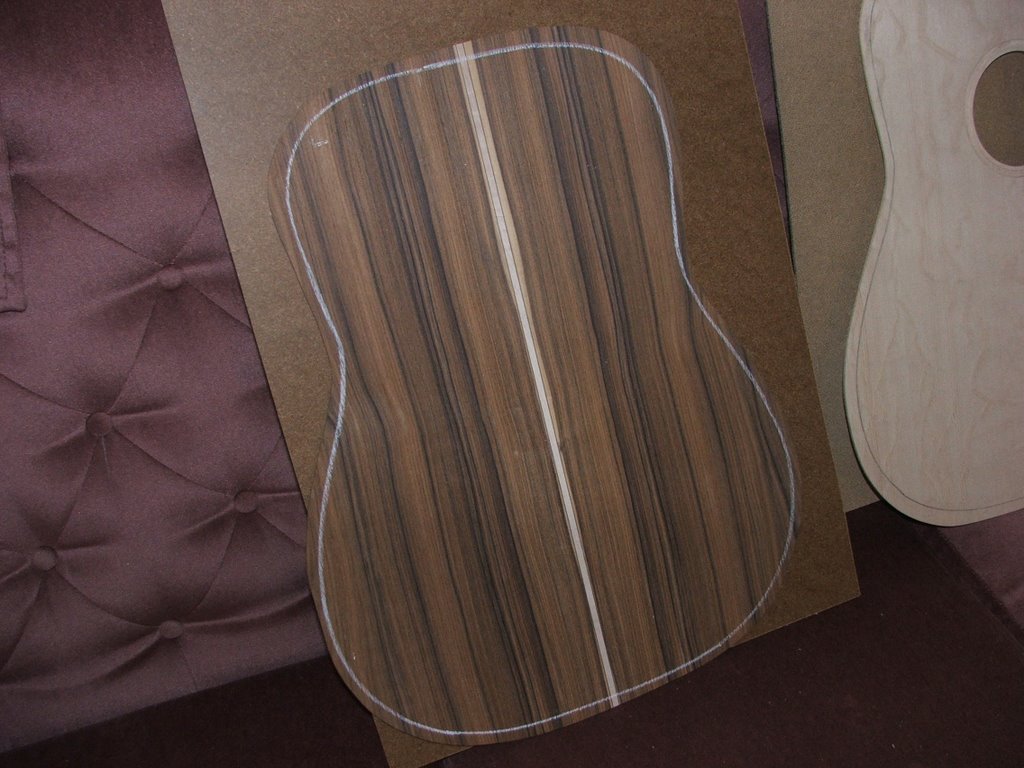
It arrived. I am so pleased with the look of the wood however in hindsight, I would not have had a back strip put in as there was what appeared to be a nice light coloured feature in the back as it was. That feature looks kind of muddled up now – still it is beautiful.

In my opinion, LMI package their kits a lot better than Stew Mac. Tape is used in an attempt to hold the sides in place, each piece is well labeled and securely packaged.

I am also back to square one, worried that I do not have the skills to get this job done. Shaping sides, braces and end blocks worry me. Now I see why everyone recommends that beginners start with a Stew Mac, there are a couple of little fiddly steps that have already been taken care of. Still, I am up for the challenge.
The process begins again.
Time taken :
Tools used :
AU$'s spent :

In my opinion, LMI package their kits a lot better than Stew Mac. Tape is used in an attempt to hold the sides in place, each piece is well labeled and securely packaged.
I am also back to square one, worried that I do not have the skills to get this job done. Shaping sides, braces and end blocks worry me. Now I see why everyone recommends that beginners start with a Stew Mac, there are a couple of little fiddly steps that have already been taken care of. Still, I am up for the challenge.
The process begins again.
Time taken :
Tools used :
AU$'s spent :
Sunday, December 10, 2006
It's Not Done Yet
Turned my hand over the weekend to get this action down. It is now lower and near enough to being acceptable, but I do think that I have to one day reset the neck. I am a couple of millimeters out here and there but it all adds up. I think next time I will set the neck before the fingerboard goes on.
The finish - I just don't know about. I don't yet know if the KTM-9 handles sweat well. There is an obvious haze where my strumming arm rests on the body. I wash often (honest). Also, I don't think that my Martin Guitar Co. cleaner suits the KTM-9. Perhaps the Martin product is suited to a Nitro styled finish... might keep testing and see what results I get over time.
I was in the guitar shop the other day and really liked the raw Martins and Matons, with no finish, no bindings - raw. Might have already planned number three.... ooopss
Time taken : 1 hour or so
Tools used : vice, file, string winder
AU$'s spent : Nil
Friday, December 08, 2006
It's on its way
Fedex have sent me an Email, letting me know that my new kit is on its way. I can't wait. I think I am just as excited as I waqs with the first one. I ordered the kit on the 27th of November so it only took LMI about 10 days to gather the material and service the parts that I needed. Obviously they couldn't just grab the box off the shelf like a prepared kit from Stewart-Macdonald
Friday, December 01, 2006
Things are getting better.
The OOO is really starting to settle. More likely, I am getting used to playing the wider neck. I still have some adjusting to do and I need to glue in a piece of card or what not.
It appears that LMI have not yet sent my new kit. Somewhat my fault because I threw in a glue order at the last moment. I guess LMI also have to individually pack the pieces of the kit so it'll take more time than just grabbing a box off the shelve.
I am also now in panic mode that the maple binding will not match or suit the Pau Ferro back and sides. It is have to visualise what woods will actually look like at when put together.
Subscribe to:
Comments (Atom)