After that, I got busy making the U shaped brace for the sides once I glue the ends up. I made it smaller than the template size, just slightly and I with an I also had a few dry runs at gluing the ends up. It is a lot harder to do than it looks on the video. I am starting to worry that I will muck up the simplest of tasks.
I might be getting a bit ahead of myself but I wanted to keep going so I pulled out the top and back to start tracing the outline of the braces. I seemed at first that the top was not long enough, the outline on the template barely fit onto the wood supplied. I used a lawyers bobkin to pierce a hole in the template. In hindsight I might have punched the holes through in the opposite direction first, that way I am not pushing hard onto the wood.
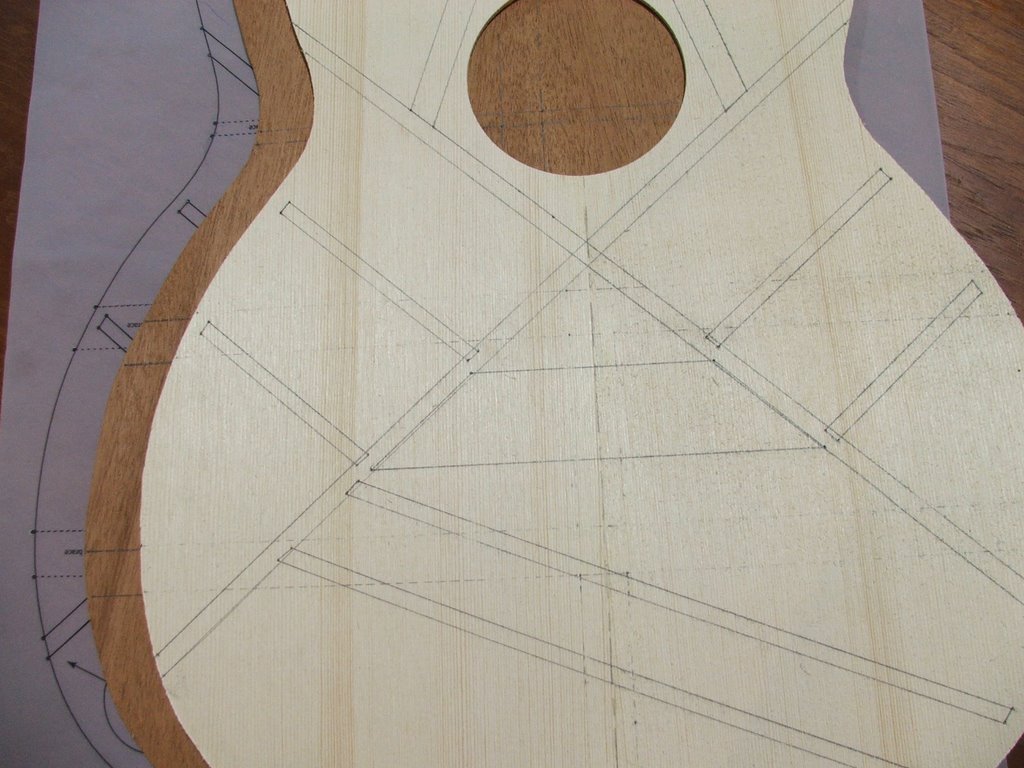
My mistake for today - the dotted lines on the StewMac template - are for the back... there is no need to trace them onto the top...
Time taken : 2 Hours
Tools used : Auto putty, scrap wood, pencil, lawyers bobkin, pencil sharpener, a long ruler, vice, electric drill, hand saw
AU$'s spent : Nil
No comments:
Post a Comment